From bare metal server to operating system
Note
Skip this phase if you are installing on the virtual machine, respective on the host with the operating system installed already.
Prerequisites
- The server that conforms to prescribed data storage organisation.
- Bootable USB stick with Ubuntu Server 22.04 LTS; the most recent release.
- Access to the server equipped with a monitor and a keyboard; alternatively over IPMI or equivalent Out-of-band management.
- Network connectivity with enabled outgoing access to the Internet.
Note
These are additional prerequisites on top of the general prerequisites.
Steps
1) Boot the server using a bootable USB stick with Ubuntu Server.
Insert the bootable USB stick into the USB port of the server, then power on the server.
Use UEFI partition on the USB stick as a boot device.
Select "Try or Install Ubuntu Server" in a boot menu.
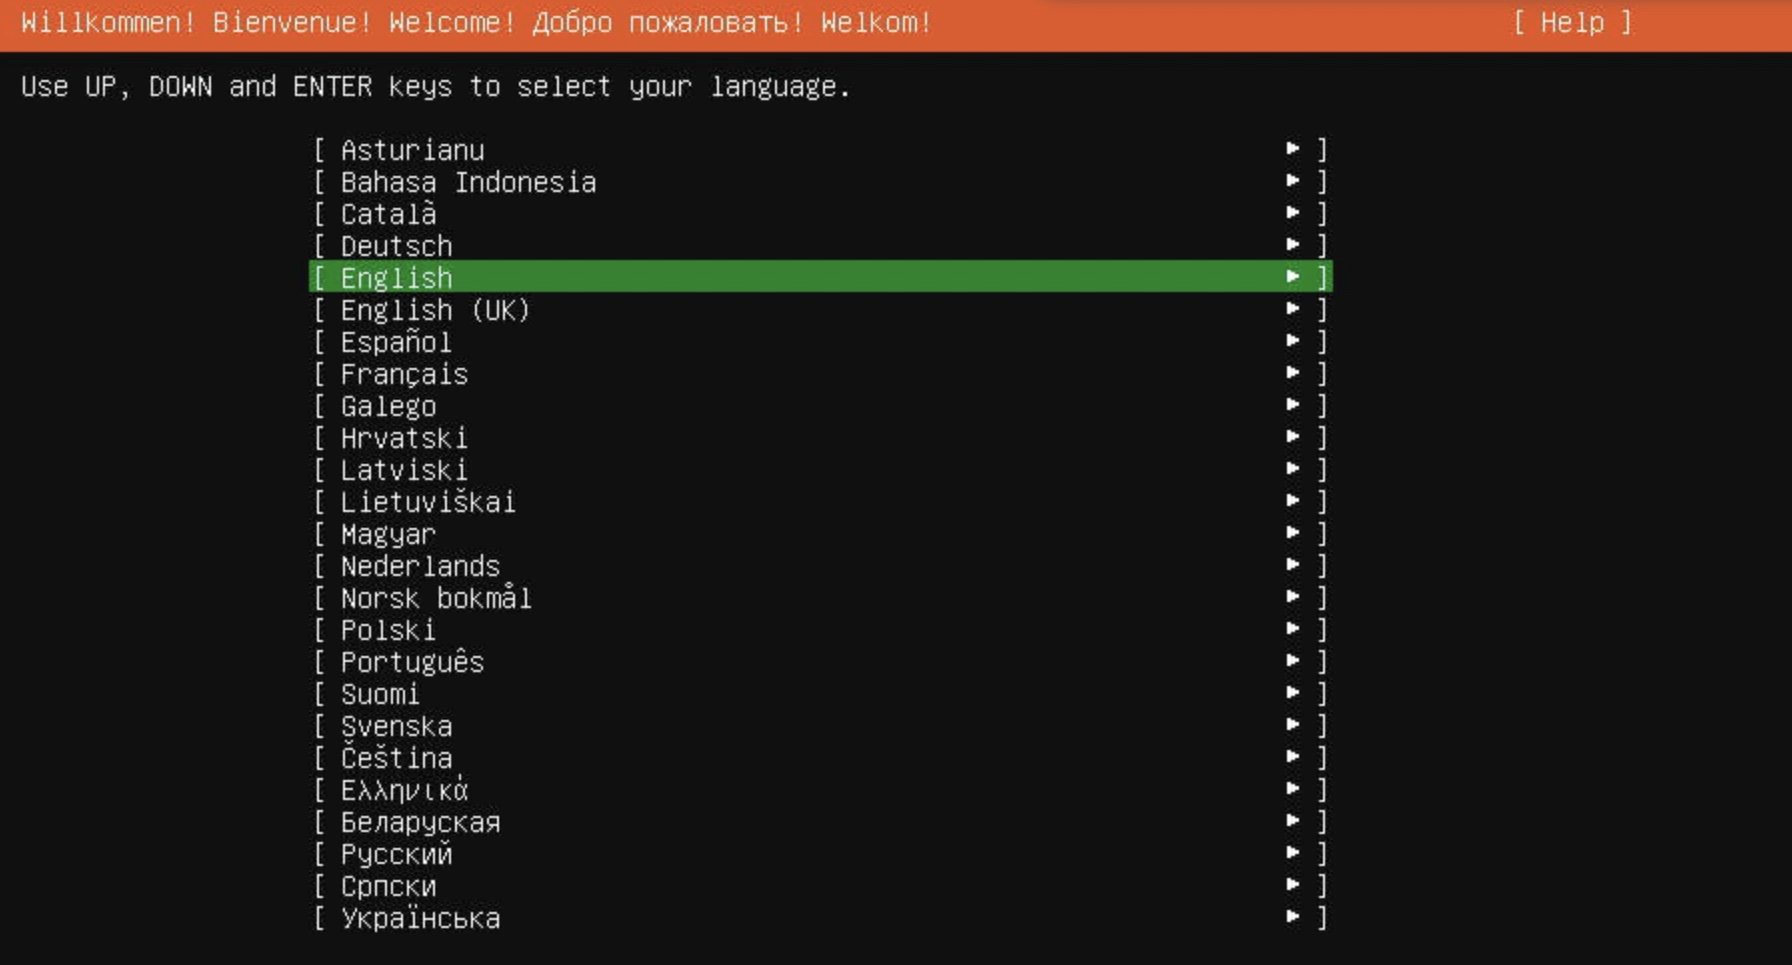
2) Select "English" as the language
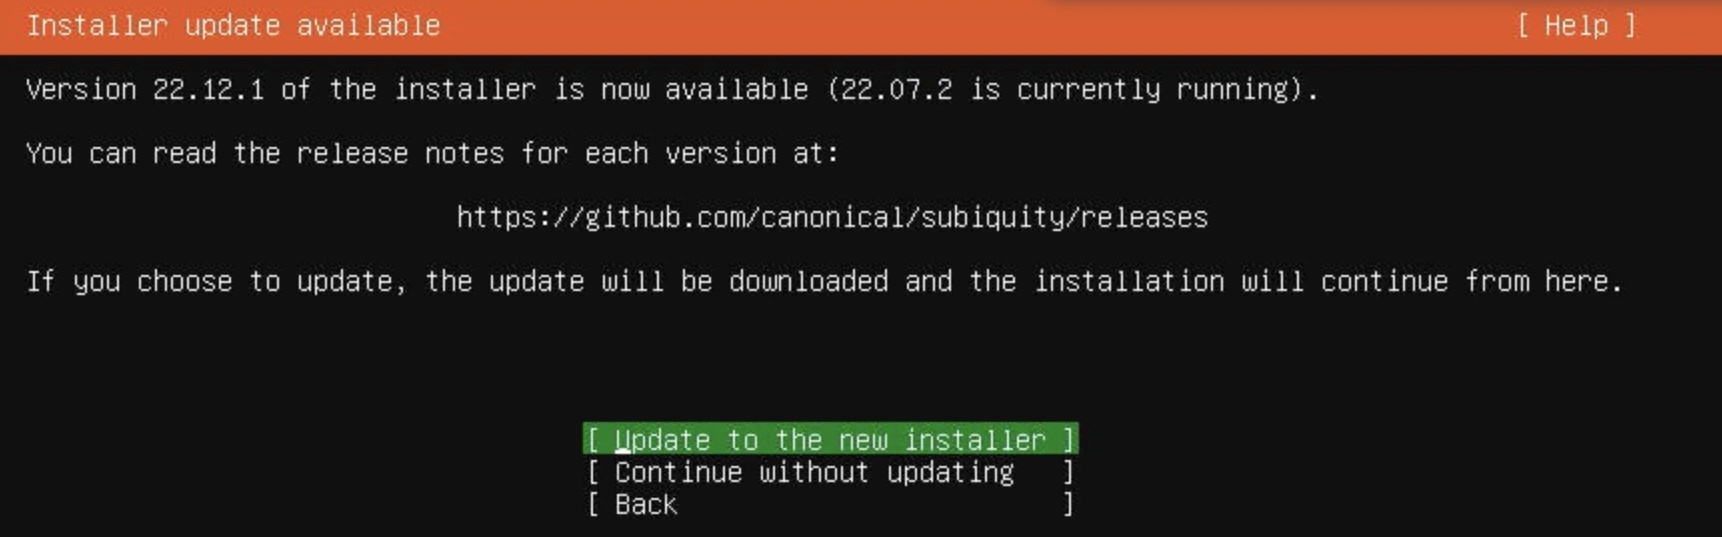
3) Update to the new installer if needed
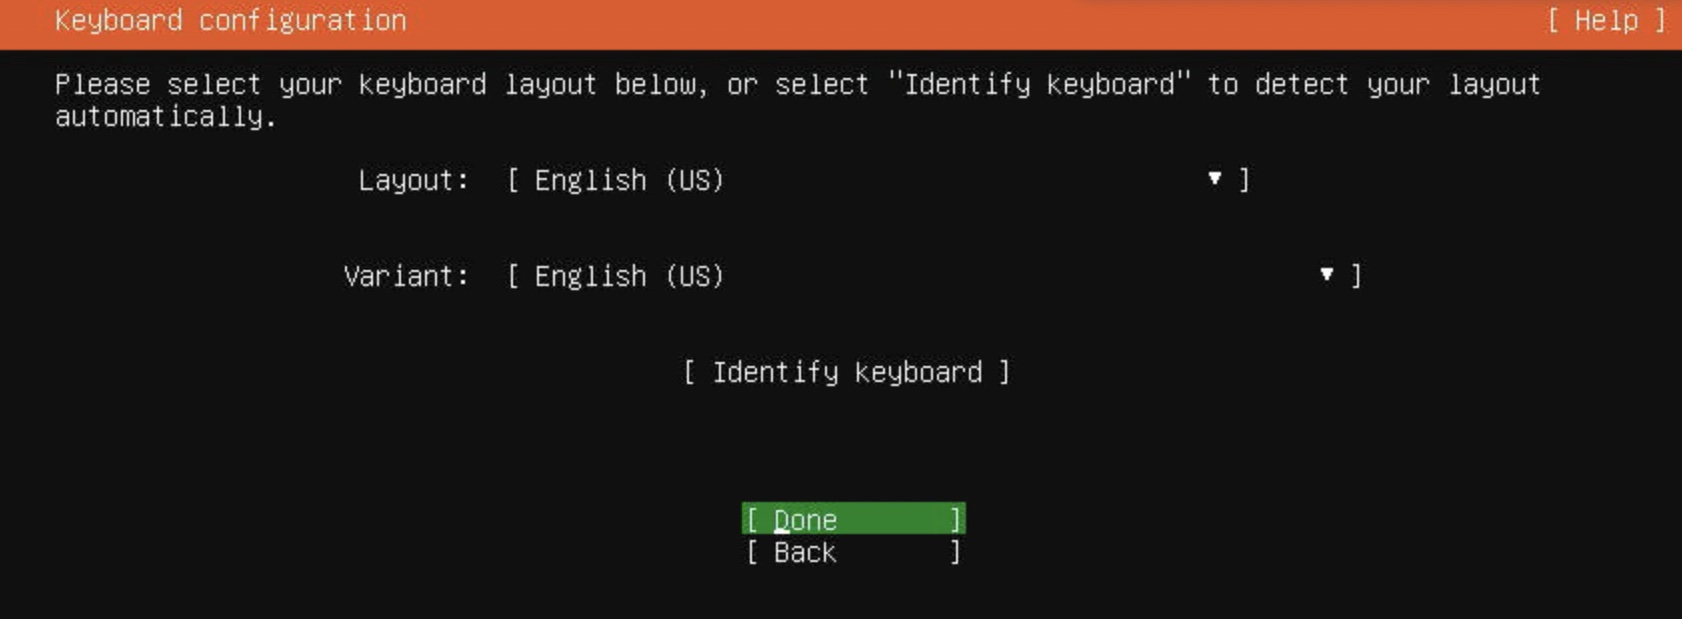
4) Select the english keyboard layout
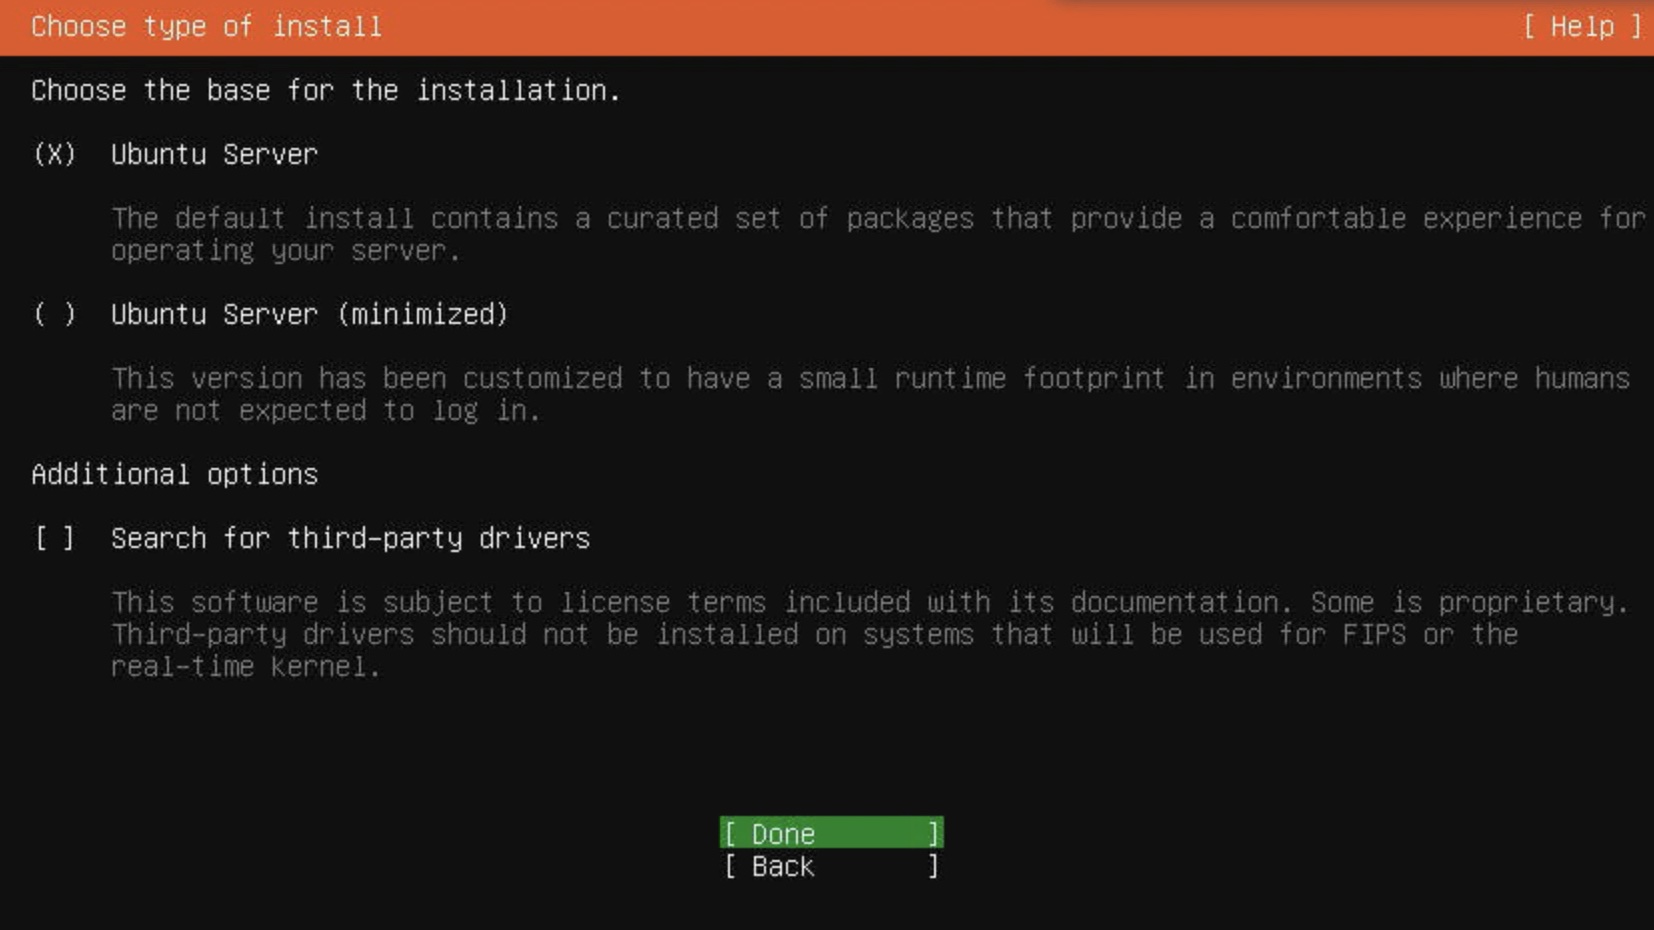
5) Select the "Ubuntu Server" installation type
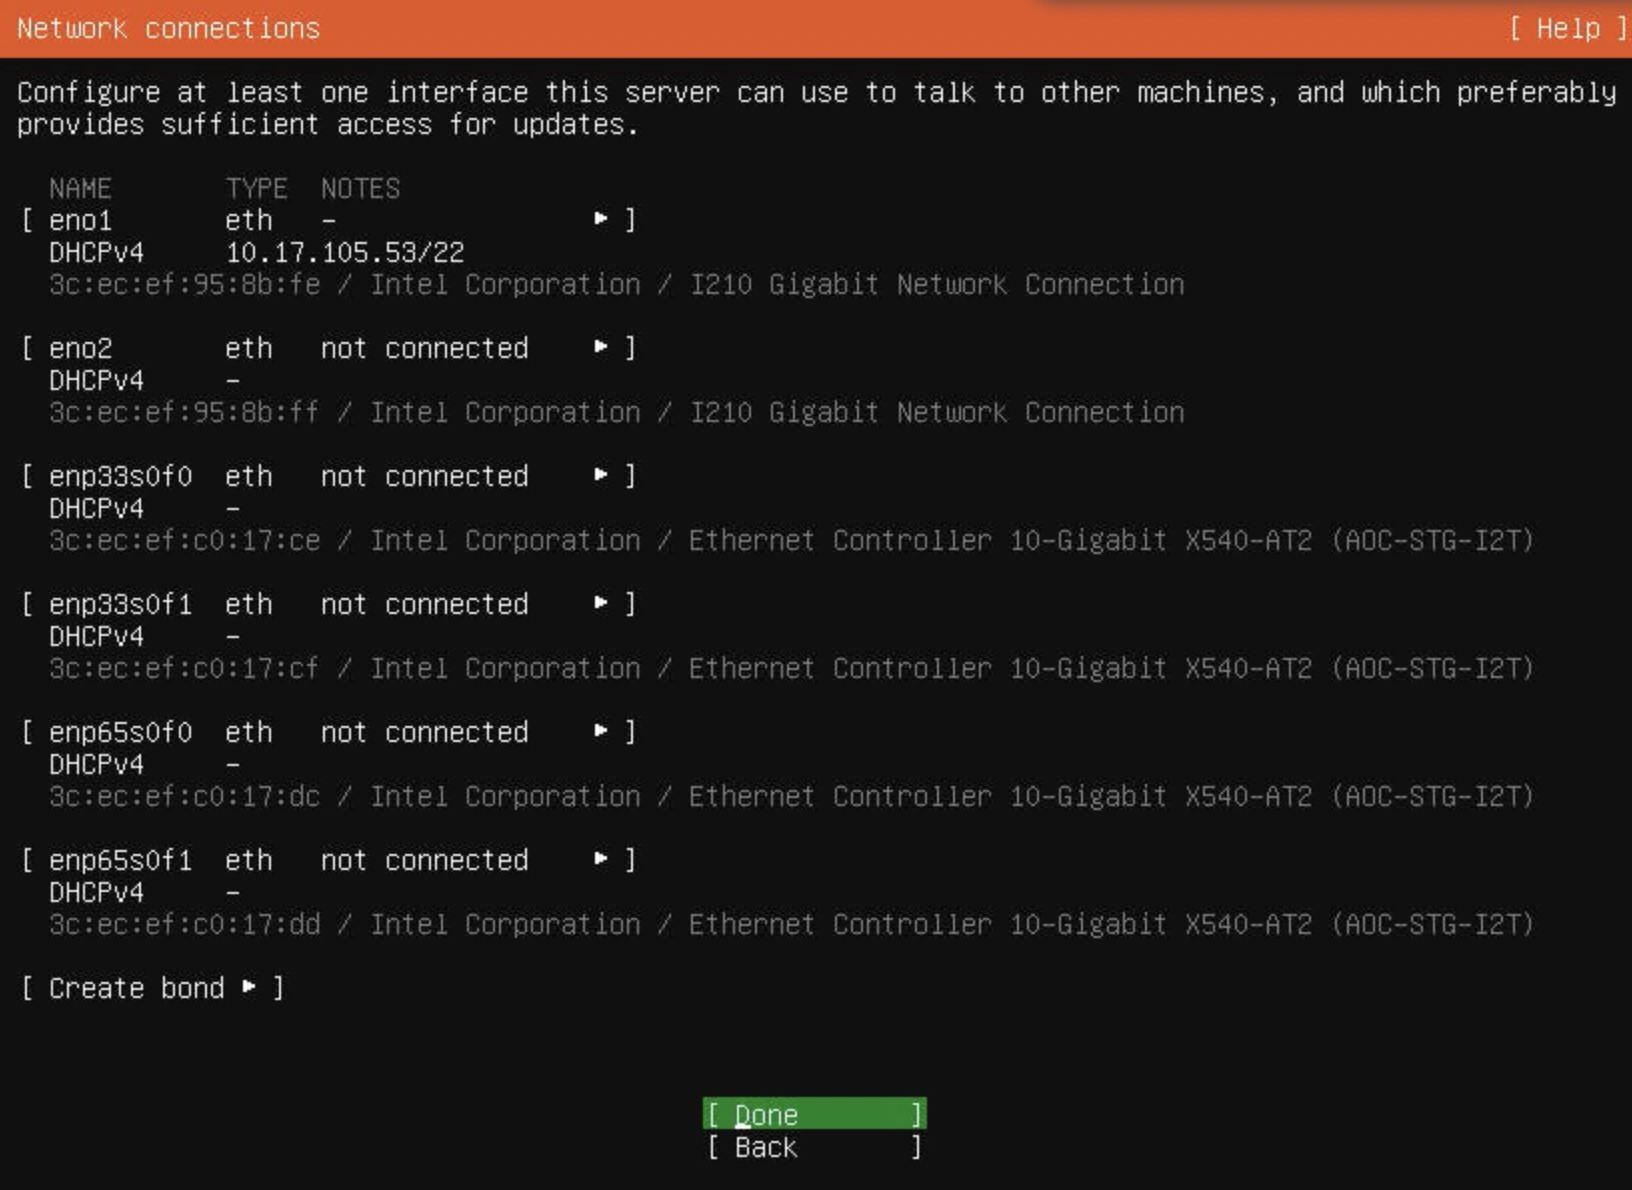
6) Configure the network connection
This is the network configuration for the installation purposes, the final network configuration can be different.
If you are using DHCP server, the network configuration is automatic.
IMPORTANT: The Internet connectivity must be available.
Note the IP address of the server for a future use.
7) Skip or configure the proxy server
Skip (press "Done") the proxy server configuration.
8) Confirm selected mirror address
Confirm the selected mirror address by pressing "Done".
9) Select "Custom storage layout"
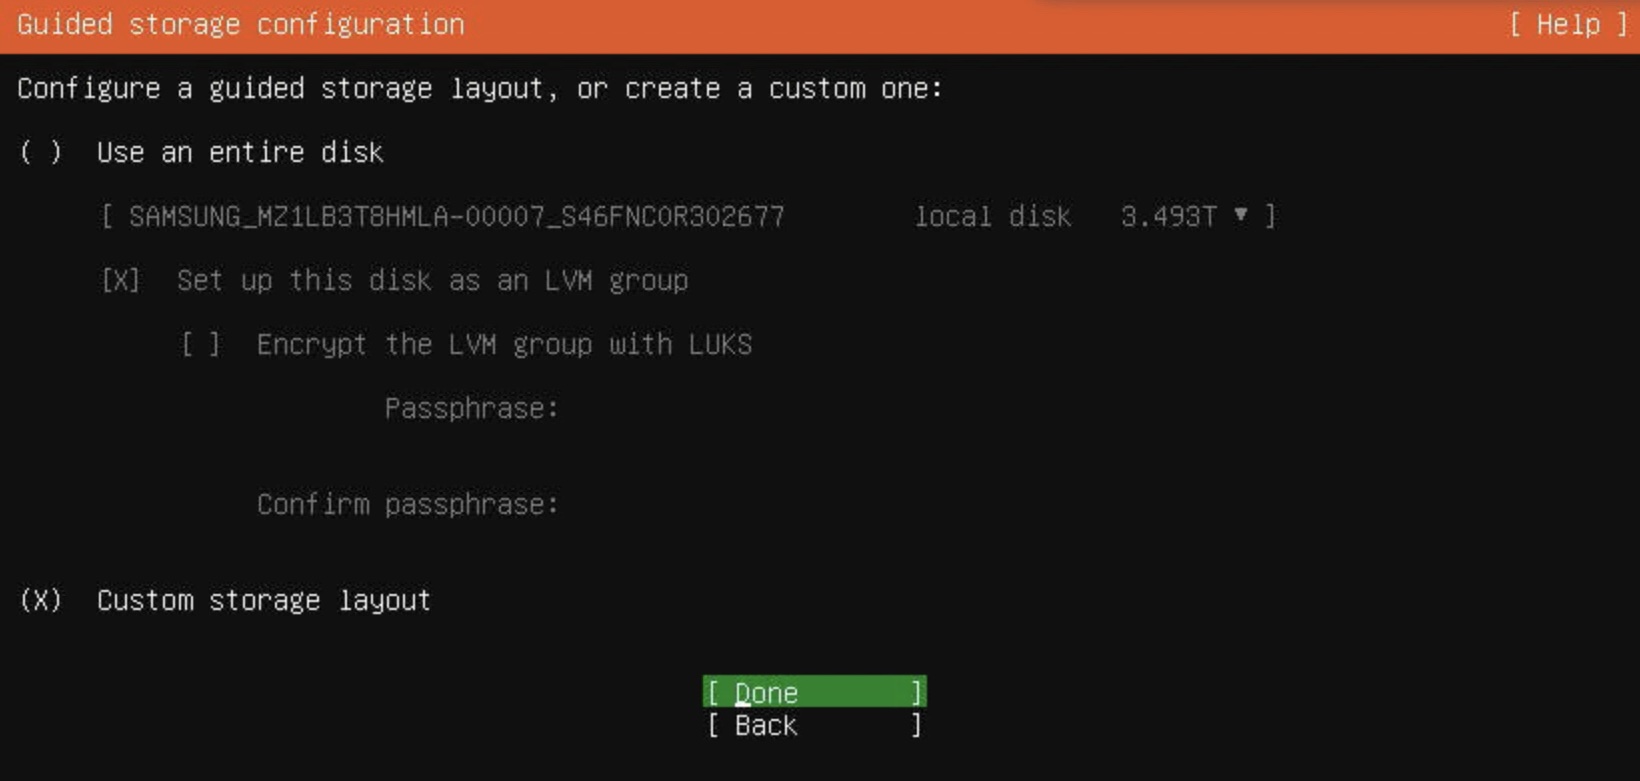
The custom storage layout of the system storage is as follows:
| Mount | Size | FS | Part. | RAID / Part. | VG / LV |
|---|---|---|---|---|---|
/boot/efi |
1G | fat32 | 1 | ||
| SWAP | 64G | 2 | |||
/boot |
2G | ext4 | 3 | md0 / 1 |
|
/ |
50G | etx4 | 3 | md0 / 2 |
systemvg / rootlv |
/var/log |
50G | etx4 | 3 | md0 / 2 |
systemvg / loglv |
| Unused | >100G | 3 | md0 / 2 |
systemvg |
Legend:
- FS: Filesystem
- Part.: GUID Partition
- RAID / Part.: MD RAID volume and a partition on the given RAID volume
- VG: LVM Volume Group
- LV: LVM Logical Volume
Note
Unused space will be used later in the installation for i.e. Docker containers.
10) Identify two system storage drives

The two system storage drives are structured symmetrically to provided redundancy in case of one system drive failure.
Note
The fast and slow storage is NOT configured here during the OS installation but later from the installed OS.
11) Set the first system storage as a primary boot device

This step will create a first GPT partition with UEFI, that is mounted at /boot/efi.
The size of this partition is approximately 1GB.
12) Set the second system storage as a secondary boot device

Another UEFI partition is created on the second system storage.

13) Create SWAP partitions on both system storage drives
On each of two drives, add a GPT partition with size 64G and format swap.
Select "free space" on respective system storage drive and then "Add GPT Partition"
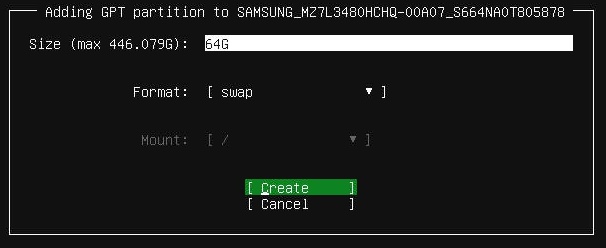
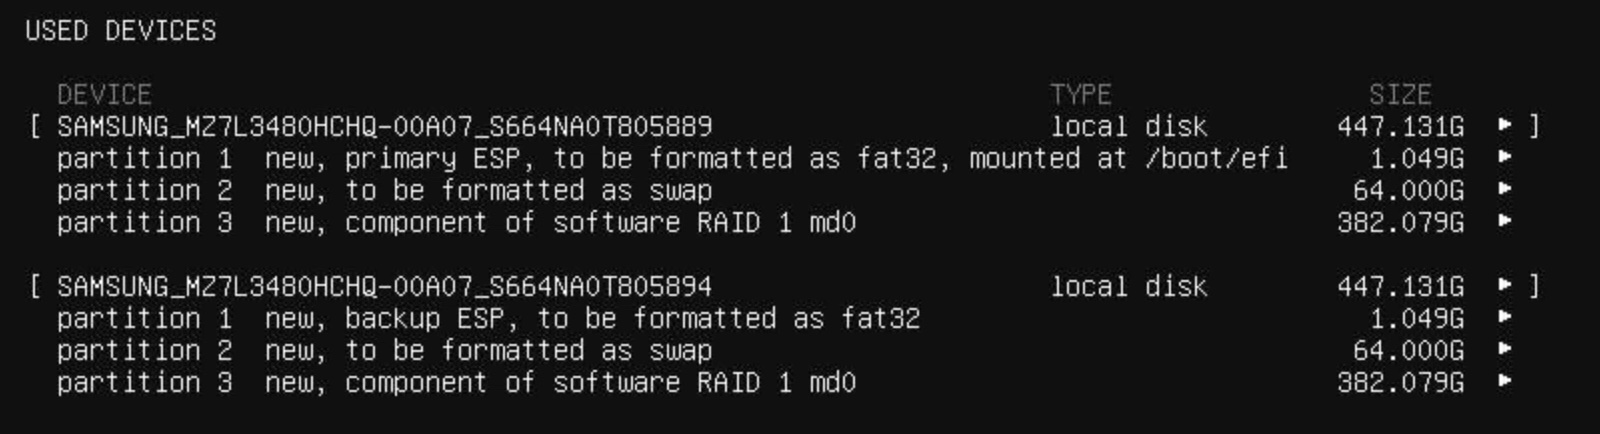
Resulting layout is as follows:

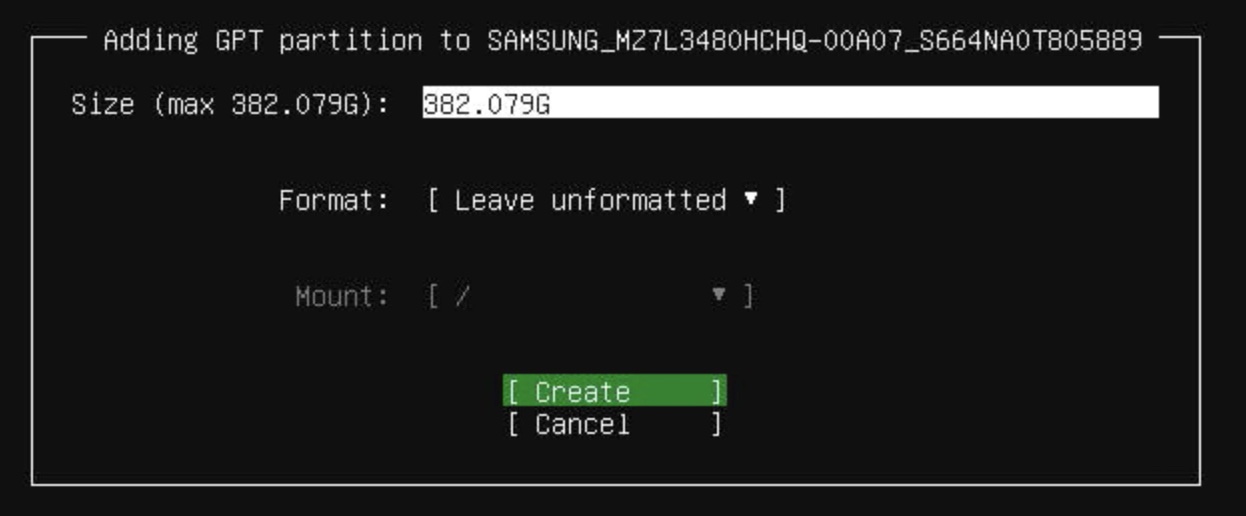
14) Create the GPT partition for RAID1 on both system storage drives
On each of two drives, add GPT partition with the all remaining free space. The format is "Leave unformatted" because this partition will be added to the RAID1 array. You can leave “Size” blank to use all the remaining space on the device.
The result is "partition" entry instead of the "free space" on respective drives.
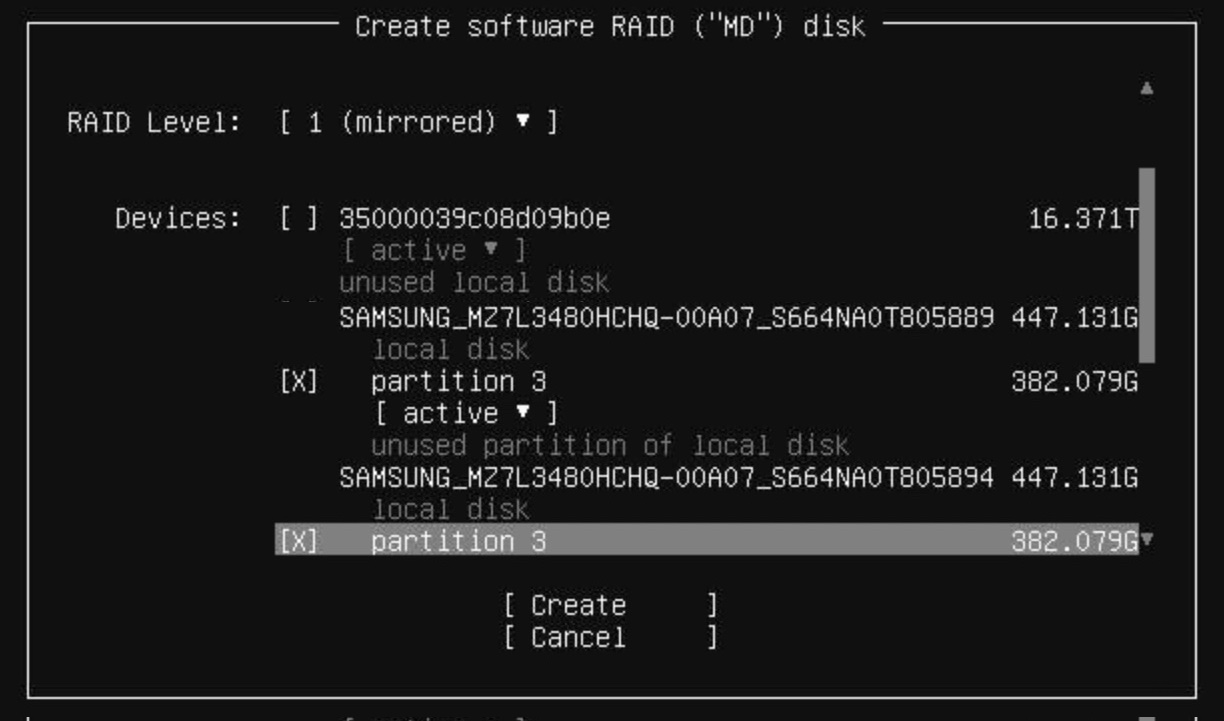
15) Create software RAID1
Select "Create software RAID (md)".
The name of the array is md0 (default).
RAID level is "1 (mirrored)".
Select two partitions from the above step, keep them marked as "active", and press "Create".
The layout of system storage drives is following:
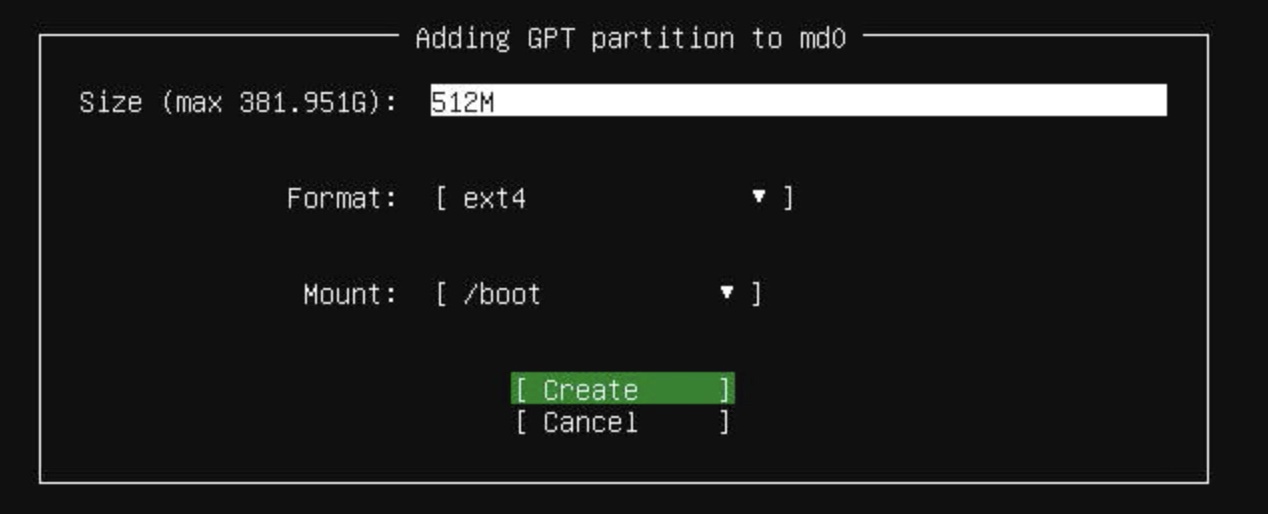
16) Create a BOOT partition of the RAID1
Add a GPT partition onto the md0 RAID1 from the step above.
The size is 2G, format is ext4 and the mount is /boot.
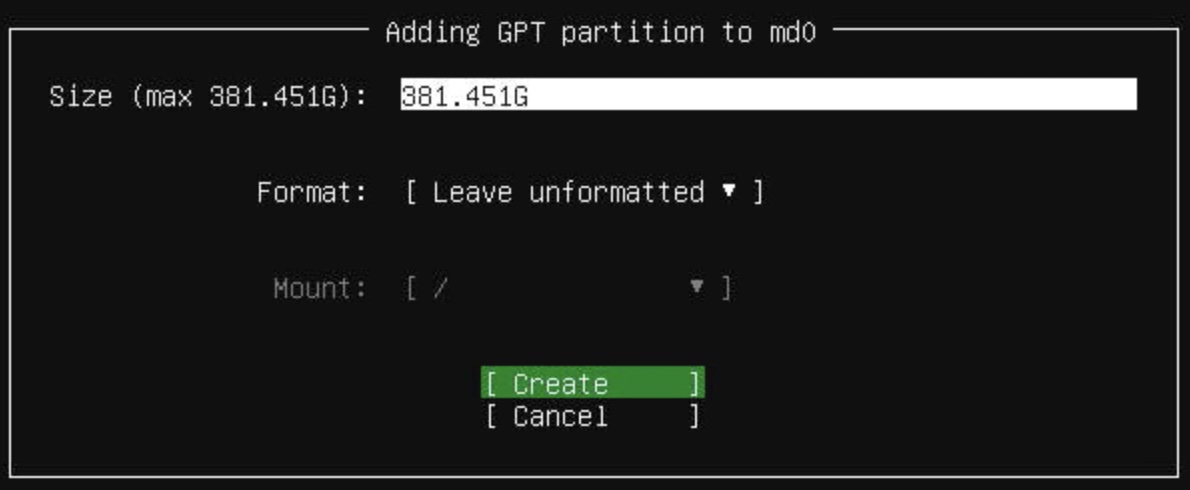
17) Setup LVM partition on the RAID1
The remaining space on the RAID1 will be managed by LVM.
Add a GPT partition onto the md0 RAID1, using "free space" entry under md0 device.
Use the maximum available space and set the format to "Leave unformatted". You can leave “Size” blank to use all the remaining space on the device.
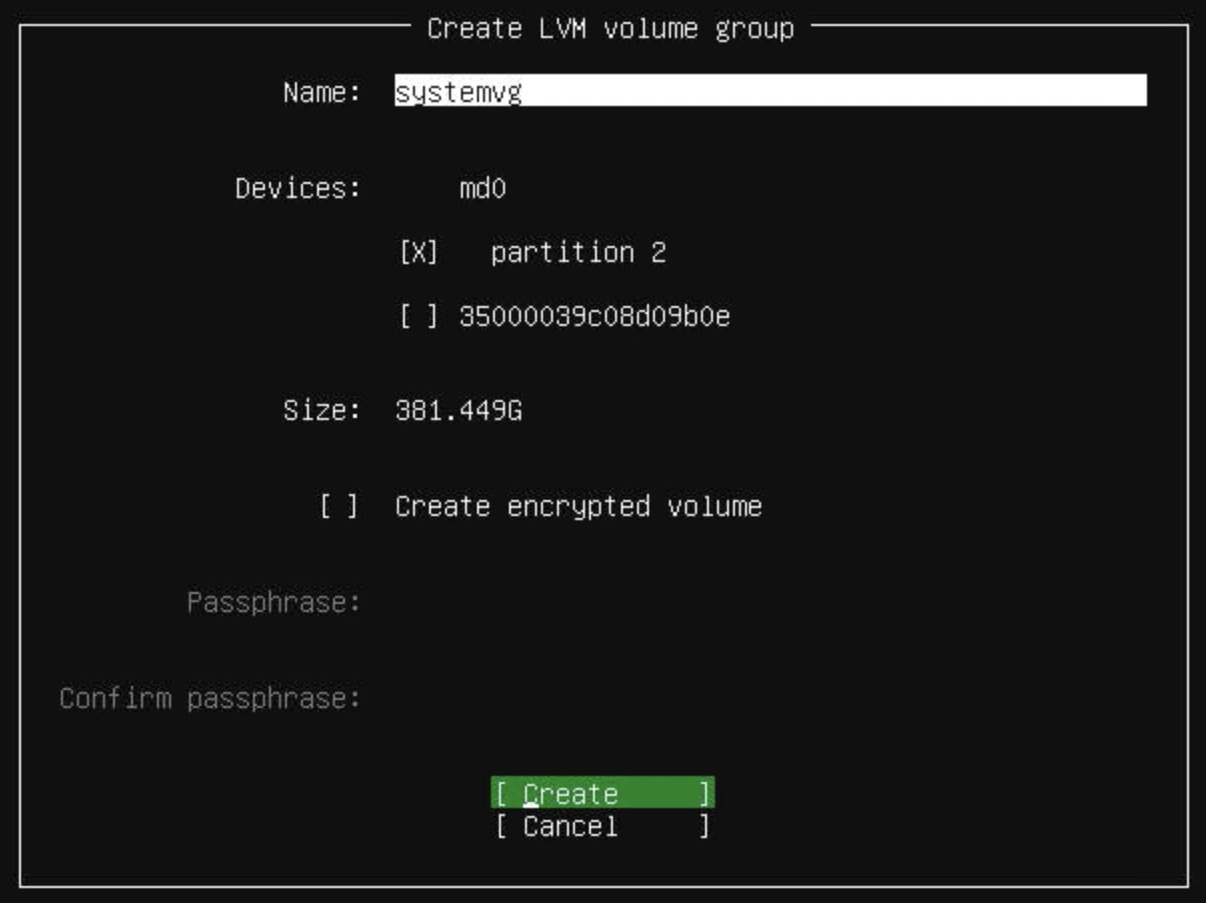
18) Setup LVM system volume group
Select "Create volume group (LVM)".
The name of the volume group is systemvg.
Select the available partition on the md0 that has been created above.
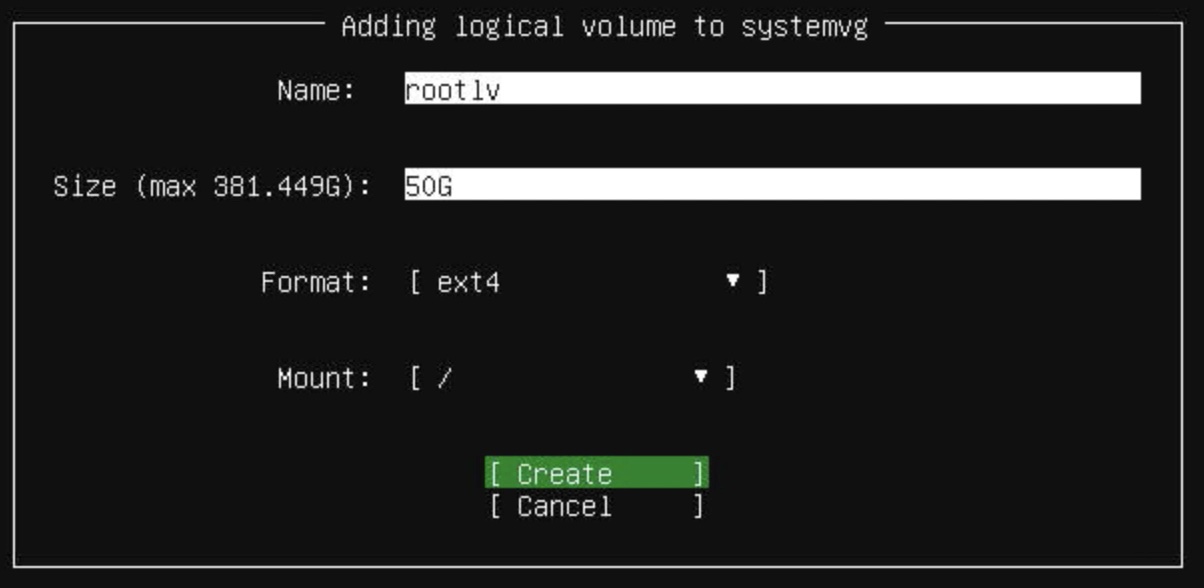
19) Create a root logical volume
Add a logical volume named rootlv on the systemvg (in "free space" entry), the size is 50G, format is ext4 and mount is /.
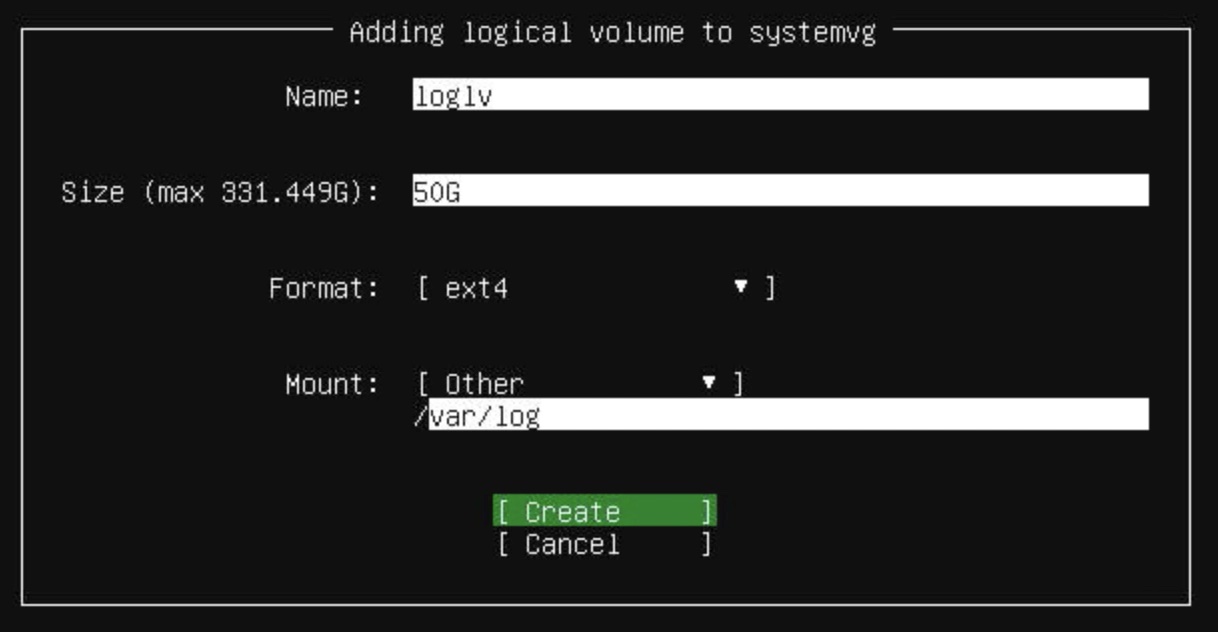
20) Add a dedicated logical volume for system logs
Add a logical volume named loglv on the systemvg, the size is 50G, format is ext4 and mount is "Other" and /var/log.
21) Confirm the layout of the system storage drives
Press "Done" on the bottom of the screen and eventually "Continue" to confirm application of actions on the system storage drives.

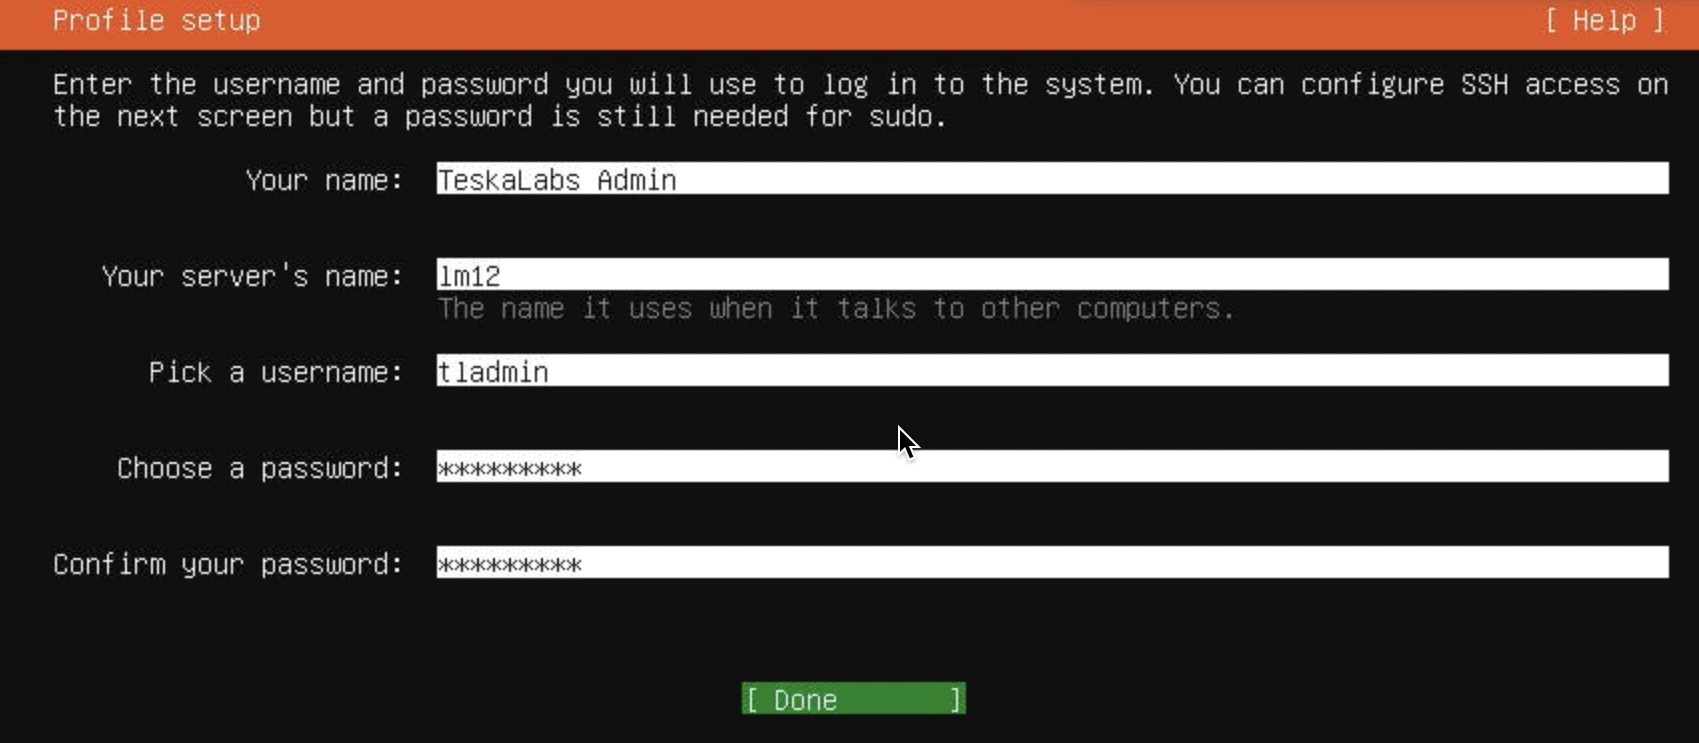
22) Profile setup
Your name: TeskaLabs Admin
Your server's name: lm01 (for example)
Pick a username: tladmin
Select a temporary password, it will be removed at the end of the installation.
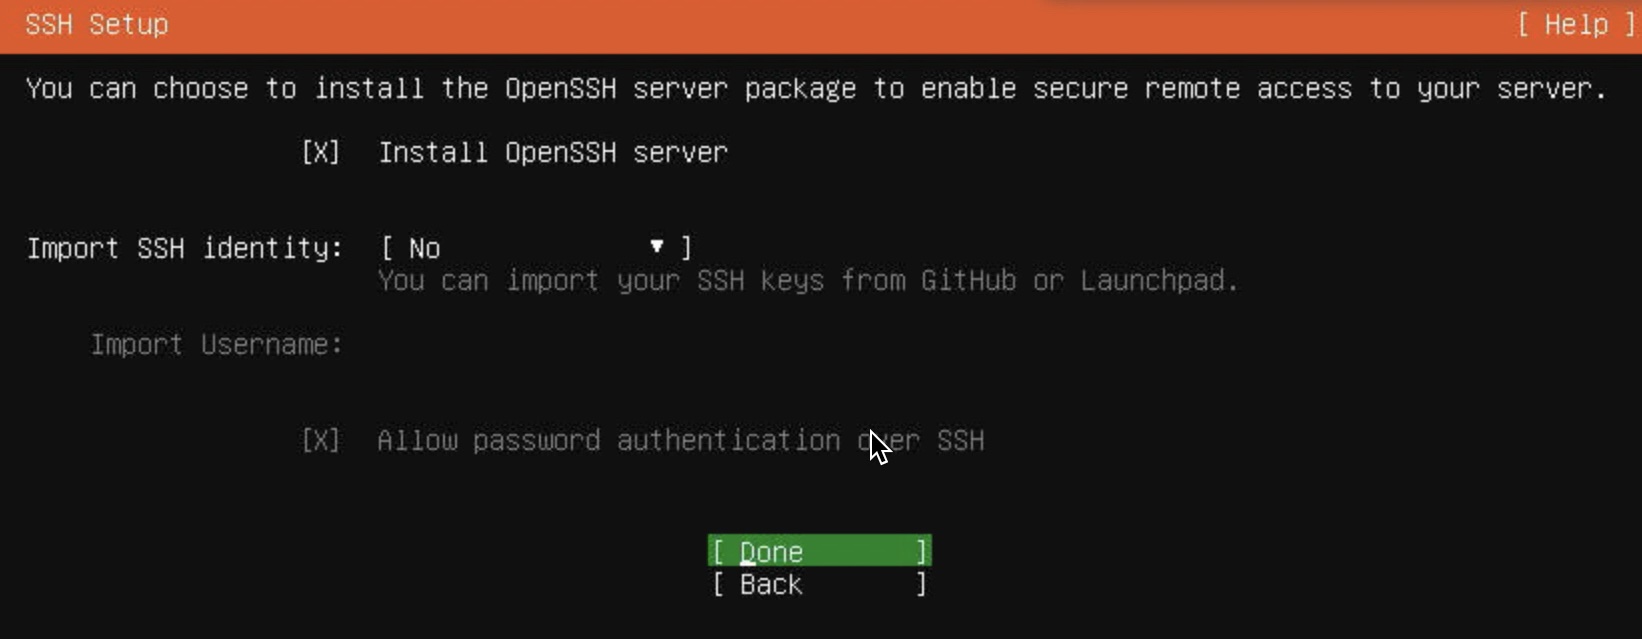
23) SSH Setup
Select "Install OpenSSH server"
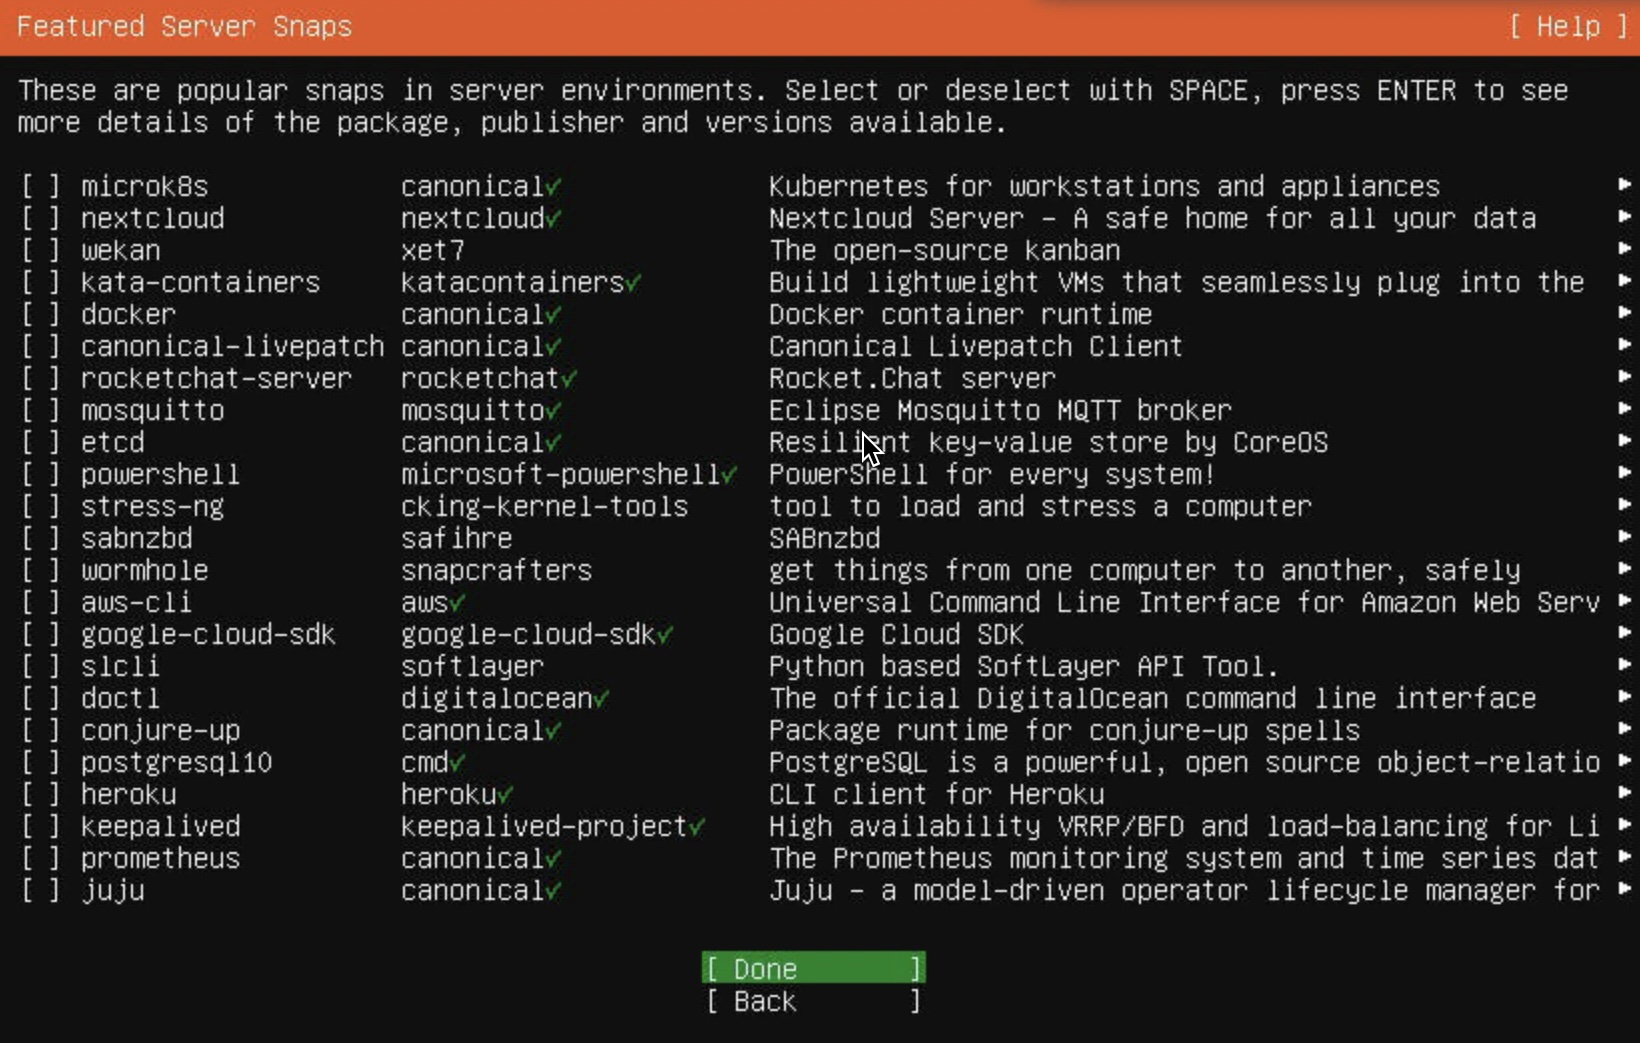
24) Skip the server snaps
Press "Done", no server snaps will be installed from this screen.
25) Wait till the server is installed
It takes approximately 10 minutes.
When the installation is finished, including security updated, select "Reboot Now".
26) When prompted, remove USB stick from the server
Press "Enter" to continue reboot process.

Note
You can skip this step if you are installing over IPMI.
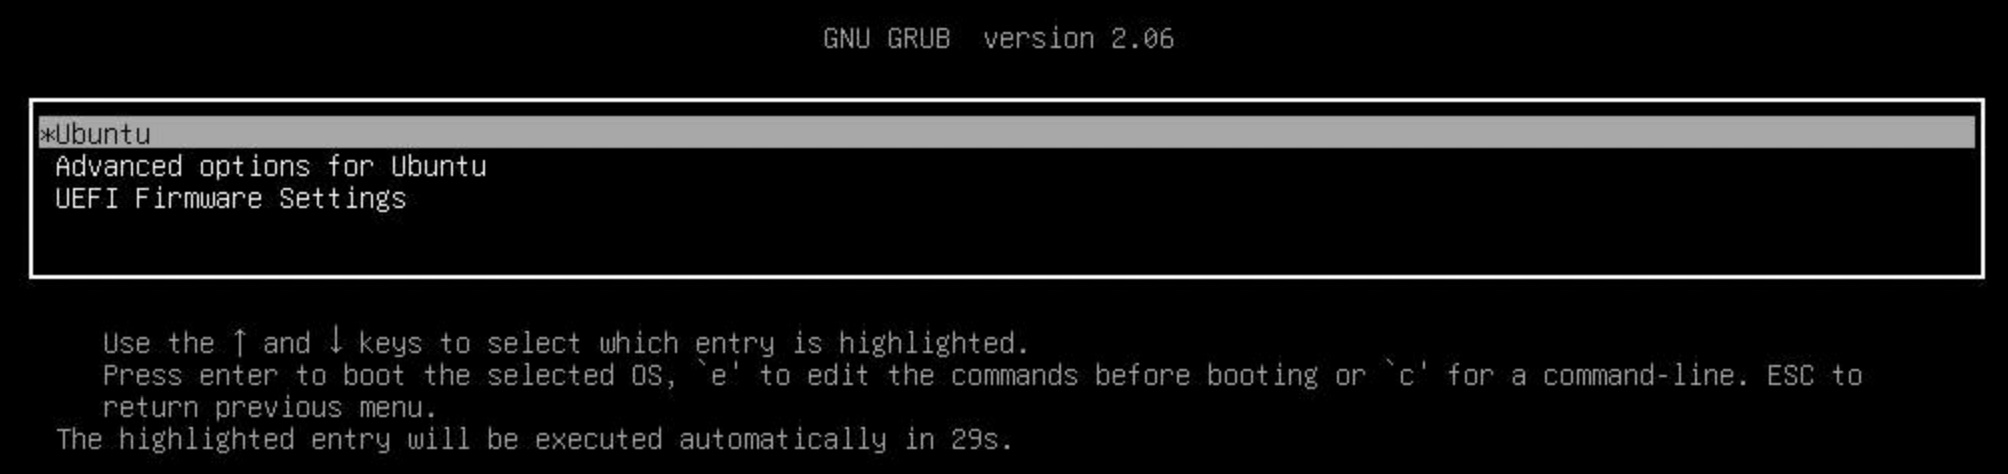
27) Boot the server into the installed OS
Select "Ubuntu" in the GRUB screen or just wait 30 seconds.
28) Login as tladmin

29) Update the operating system
sudo apt update
sudo apt upgrade
sudo apt autoremove
30) Configure the slow data storage
Slow data storage (HDD) is mounted at /data/hdd.
Assuming the server provides following disk devices /dev/sdc, /dev/sdd, /dev/sde, /dev/sdf, /dev/sdg and /dev/sdh.
Create software RAID5 array at /dev/md1 with ext4 filesystem, mounted at /data/hdd.
sudo mdadm --create /dev/md1 --level=5 --raid-devices=6 /dev/sdc /dev/sdd /dev/sde /dev/sdf /dev/sdg /dev/sdh
Note
For the RAID6 array, use --level=6.
Create a EXT4 filesystem and the mount point:
sudo mkfs.ext4 -L data-hdd /dev/md1
sudo mkdir -p /data/hdd
Enter the following line to /etc/fstab:
/dev/disk/by-label/data-hdd /data/hdd ext4 defaults,noatime 0 1
Danger
The noatime flag is important for a optimal storage performance.
Mount the drive:
sudo mount /data/hdd
Note
The RAID array construction can take substantial amount of time. You can monitor progress by cat /proc/mdstat. Server reboots are safe during RAID array construction.
You can speed up the construction by increasing speed limits:
sudo sysctl -w dev.raid.speed_limit_min=5000000
sudo sysctl -w dev.raid.speed_limit_max=50000000
These speed limit settings will last till the next reboot.
31) Configure the fast data storage
Fast data storage (SSD) is mounted at /data/ssd.
Assuming the server provides following disk devices /dev/nvme0n1 and /dev/nvme1n1.
Create software RAID1 array at /dev/md2 with ext4 filesystem, mounted at /data/ssd.
sudo mdadm --create /dev/md2 --level=1 --raid-devices=2 /dev/nvme0n1 /dev/nvme1n1
sudo mkfs.ext4 -L data-ssd /dev/md2
sudo mkdir -p /data/ssd
Enter the following line to /etc/fstab:
/dev/disk/by-label/data-ssd /data/ssd ext4 defaults,noatime 0 1
Danger
The noatime flag is important for a optimal storage performance.
Mount the drive:
sudo mount /data/ssd
32) Persist the RAID array configuration
Run:
sudo mdadm --detail --scan > /etc/mdadm/mdadm.conf
sudo echo "MAILADDR root" >> /etc/mdadm/mdadm.conf
Update the init ramdisk:
sudo update-initramfs -u
33) Disable periodic check of RAID
sudo systemctl disable mdcheck_continue
sudo systemctl disable mdcheck_start
sudo systemctl disable --now mdcheck_start.timer mdcheck_continue.timer
34) Remove cloud-init
sudo apt install netplan.io tzdata
sudo apt purge cloud-init
sudo rm -rf /etc/cloud/; sudo rm -rf /var/lib/cloud/
35) Install an essential tooling and clean up
sudo apt install cron dnsutils iputils-ping tcpdump netcat
sudo apt remove --purge lxd-installer
sudo apt autoremove
36) Installation of the OS is completed
Reboot the server to verify the correctness of the OS installation.
sudo reboot
Here is a video, that recapitulates the installation process: