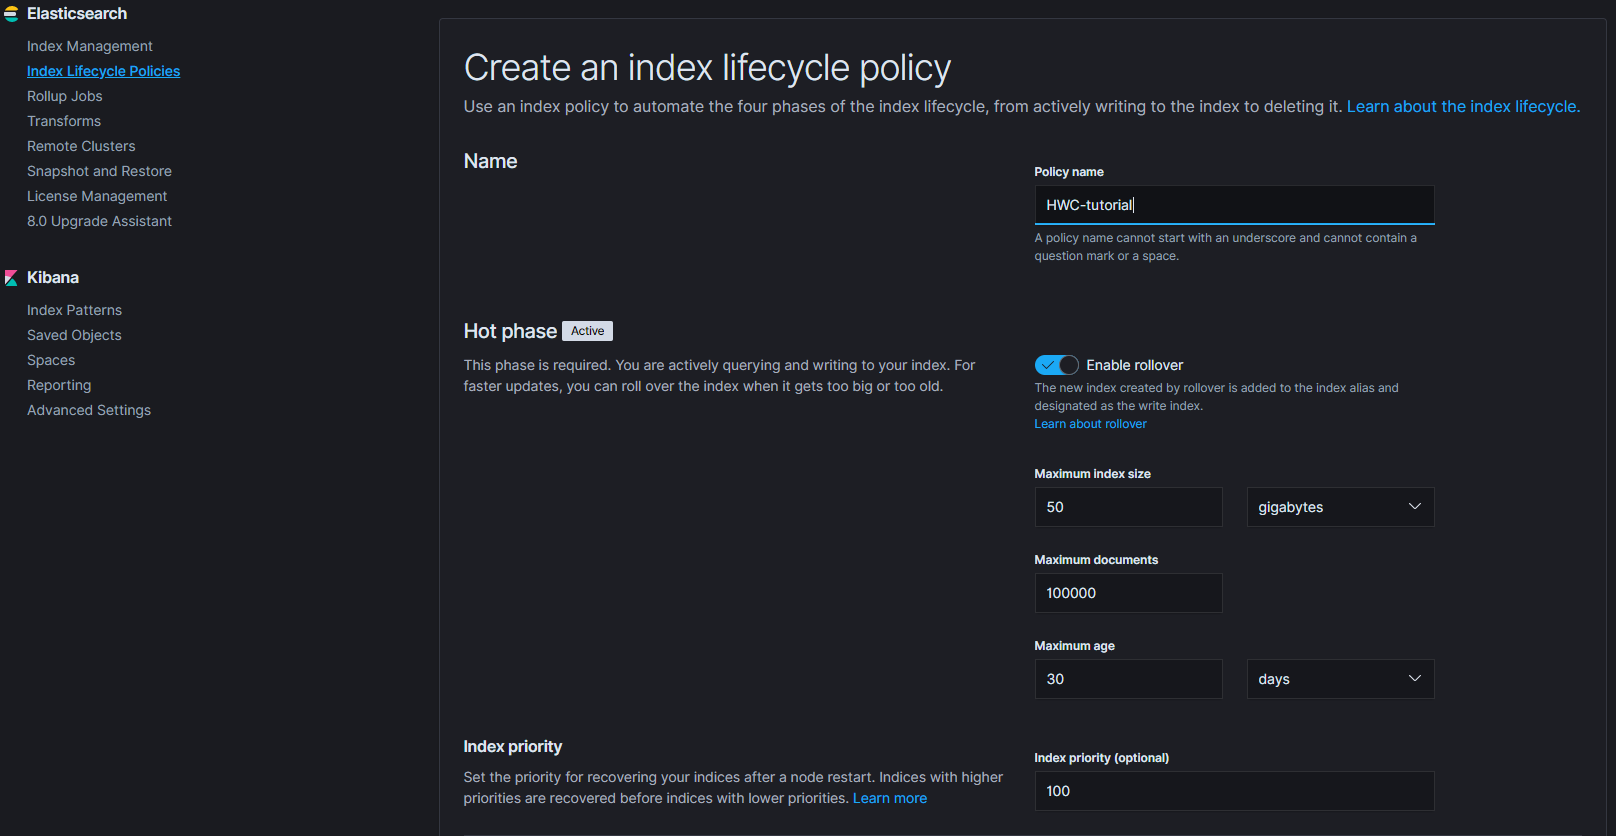
Elasticsearch index lifecycle management
Index Lifecycle Management (ILM) in Elasticsearch serves to automatically close or delete old indices (i.e. with data older than three months), so searching performance is kept and data storage is able to store present data.
TeskaLabs LogMan.io provides default ILM policy for each index.
The default ILM policy is documented here. You can change it for each Elasticsearch index in the respective Event Lane declaration. Read more about that here.
Hot-Warm-Cold architecture (HWC)
HWC is an extension of the standard index rotation provided by the Elasticsearch ILM and it is a good tool for managing time series data. HWC architecture enables us to allocate specific nodes to one of the phases. When used correctly, along with the cluster architecture, this will allow for maximum performance, using available hardware to its fullest potential.
Hot stage
There is usually some period of time (week, month, etc.), where we want to query the indexes heavily, aiming for speed, rather than memory (and other resources) conservation. That is where the “Hot” phase comes in handy, by allowing us to have the index with more replicas, spread out and accessible on more nodes for optimal user experience.
Hot nodes
Hot nodes should use the fast parts of the available hardware, using most CPU's and faster IO.
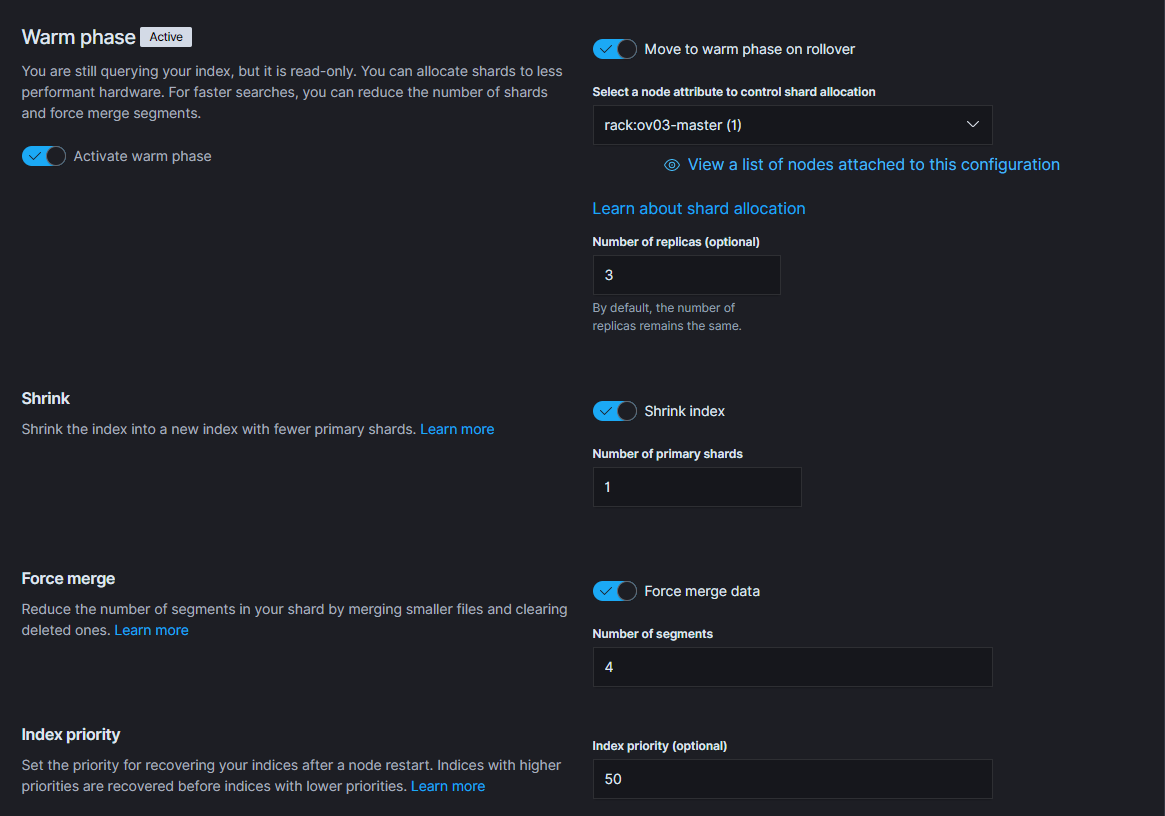
Warm stage
Once this period is over, and the indexes are no longer queried as often, we will benefit by moving them to the “Warm” phase, which allows us to reduce the number of nodes (or move to nodes with less resources available) and index replicas, lessening the hardware load, while still retaining the option to search the data reasonably fast.
Warm nodes
Warm nodes, as the name suggests, stand on the crossroads, between being solely for the storage purposes, while still retaining some CPU power to handle the occasional queries.
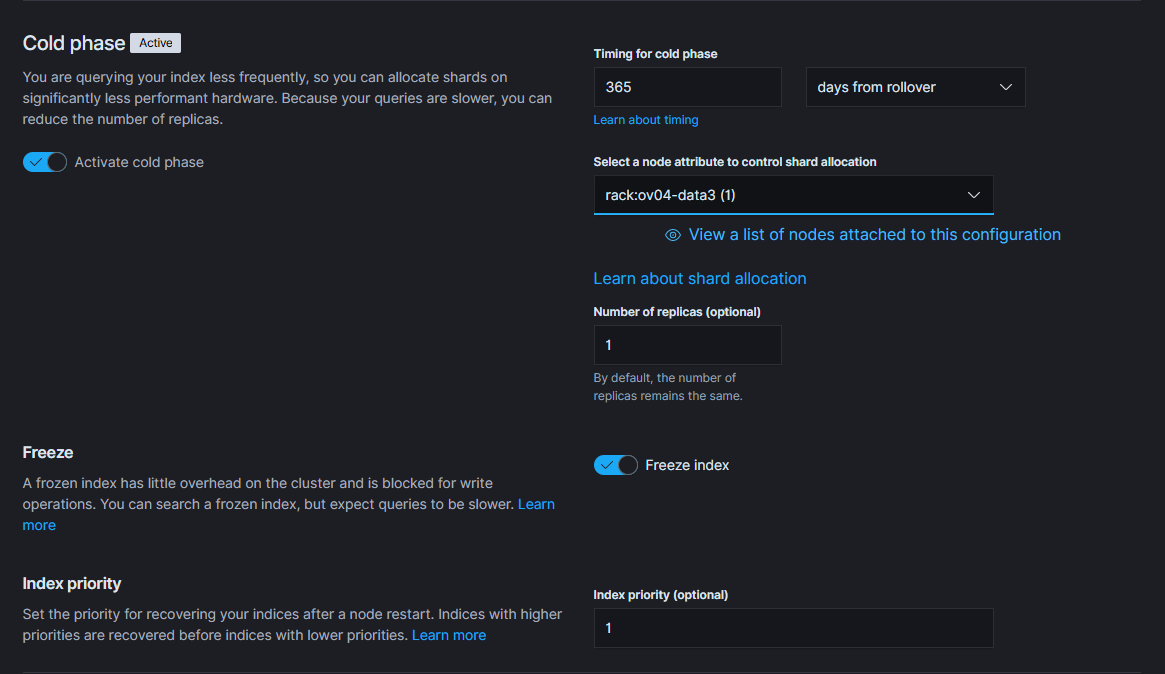
Cold stage
Sometimes, there are reasons to store data for extended periods of time (dictated by law, or some internal rule). The data are not expected to be queried, but at the same time, they cannot be deleted just yet.
Cold nodes
This is where the Cold nodes come in, there may be few, with only little CPU resources, they have no need to use SSD drives, being perfectly fine with slower (and optionally larger) storage.
Elasticsearch backup and restore
Snapshots
Located under Stack Management -> Snapshot and Restore. The snapshots are stored in the repository location. The structure is as follows. The snapshot itself is just a pointer to the indices that it contains. The indices themselves are stored in a separate directory, and they are stored incrementally. This basically means, that if you create a snapshot every day, the older indices are just referenced again in the snapshot, while only the new indices are actually copied to the backup directory.
Repositories
First, the snapshot repository needs to be set up. Specify the location where the snapshot repository resides, /backup/elasticsearch for instance. This path needs to be accessible from all nodes in the cluster. With the Elasticsearch running in docker, this includes mounting the space inside of the docker containers, and restarting them.
Policies
To begin taking snapshots, a policy needs to be created. The policy determines the naming prefix of the snapshots it creates, it specifies repository it will be using for creating snapshots, It requires a schedule setting, indices (defined using patterns or specific index names - lmio-<tenant>-events-* for instance).
Furthermore, the policy is able to specify whether to ignore unavailable indices, allow partial indices and include global state. Use of these depends on the specific case, in which the snapshot policy will be used and are not recommended by default. There is also a setting available to automatically delete snapshots and define expiration. These also depend on specific policy, the snapshots themselves however are very small (memory wise), when they do not include global state, which is to be expected since they are just pointers to a different place, where the actual index data are stored.
Restoring a snapshot
To restore a snapshot, simply select the snapshot containing the index or indices you wish to bring back and select "Restore". You then need to specify whether you want to restore all indices contained in the snapshot, or just a portion. You are able to rename the restored indices, you can also restore partially snapshot indices and modify the index setting while restoring them. Or resetting them to default. The indices are then restored as specified back into the cluster.
Caveats
When deleting snapshots, bear in mind that you need to have the backed up indices covered by a snapshot to be able to restore them. What this means is, when you for example clear some of the indices from the cluster and then delete the snapshot that contained the reference to these indexes, you will be unable to restore them.